🖥️練習用 SwiftUI 畫 Mac mini:正面
講解用 SwiftUI 畫 Mac mini M4 正面的實作重點:機殼光澤、插孔與電源燈、以及底部散熱孔的畫法。
接續前篇,繼續畫 Mac mini M4 的正面。
這一面有幾個挑戰:
- 機殼的光澤
- 機殼上的插孔及電源燈
- 底部的散熱孔
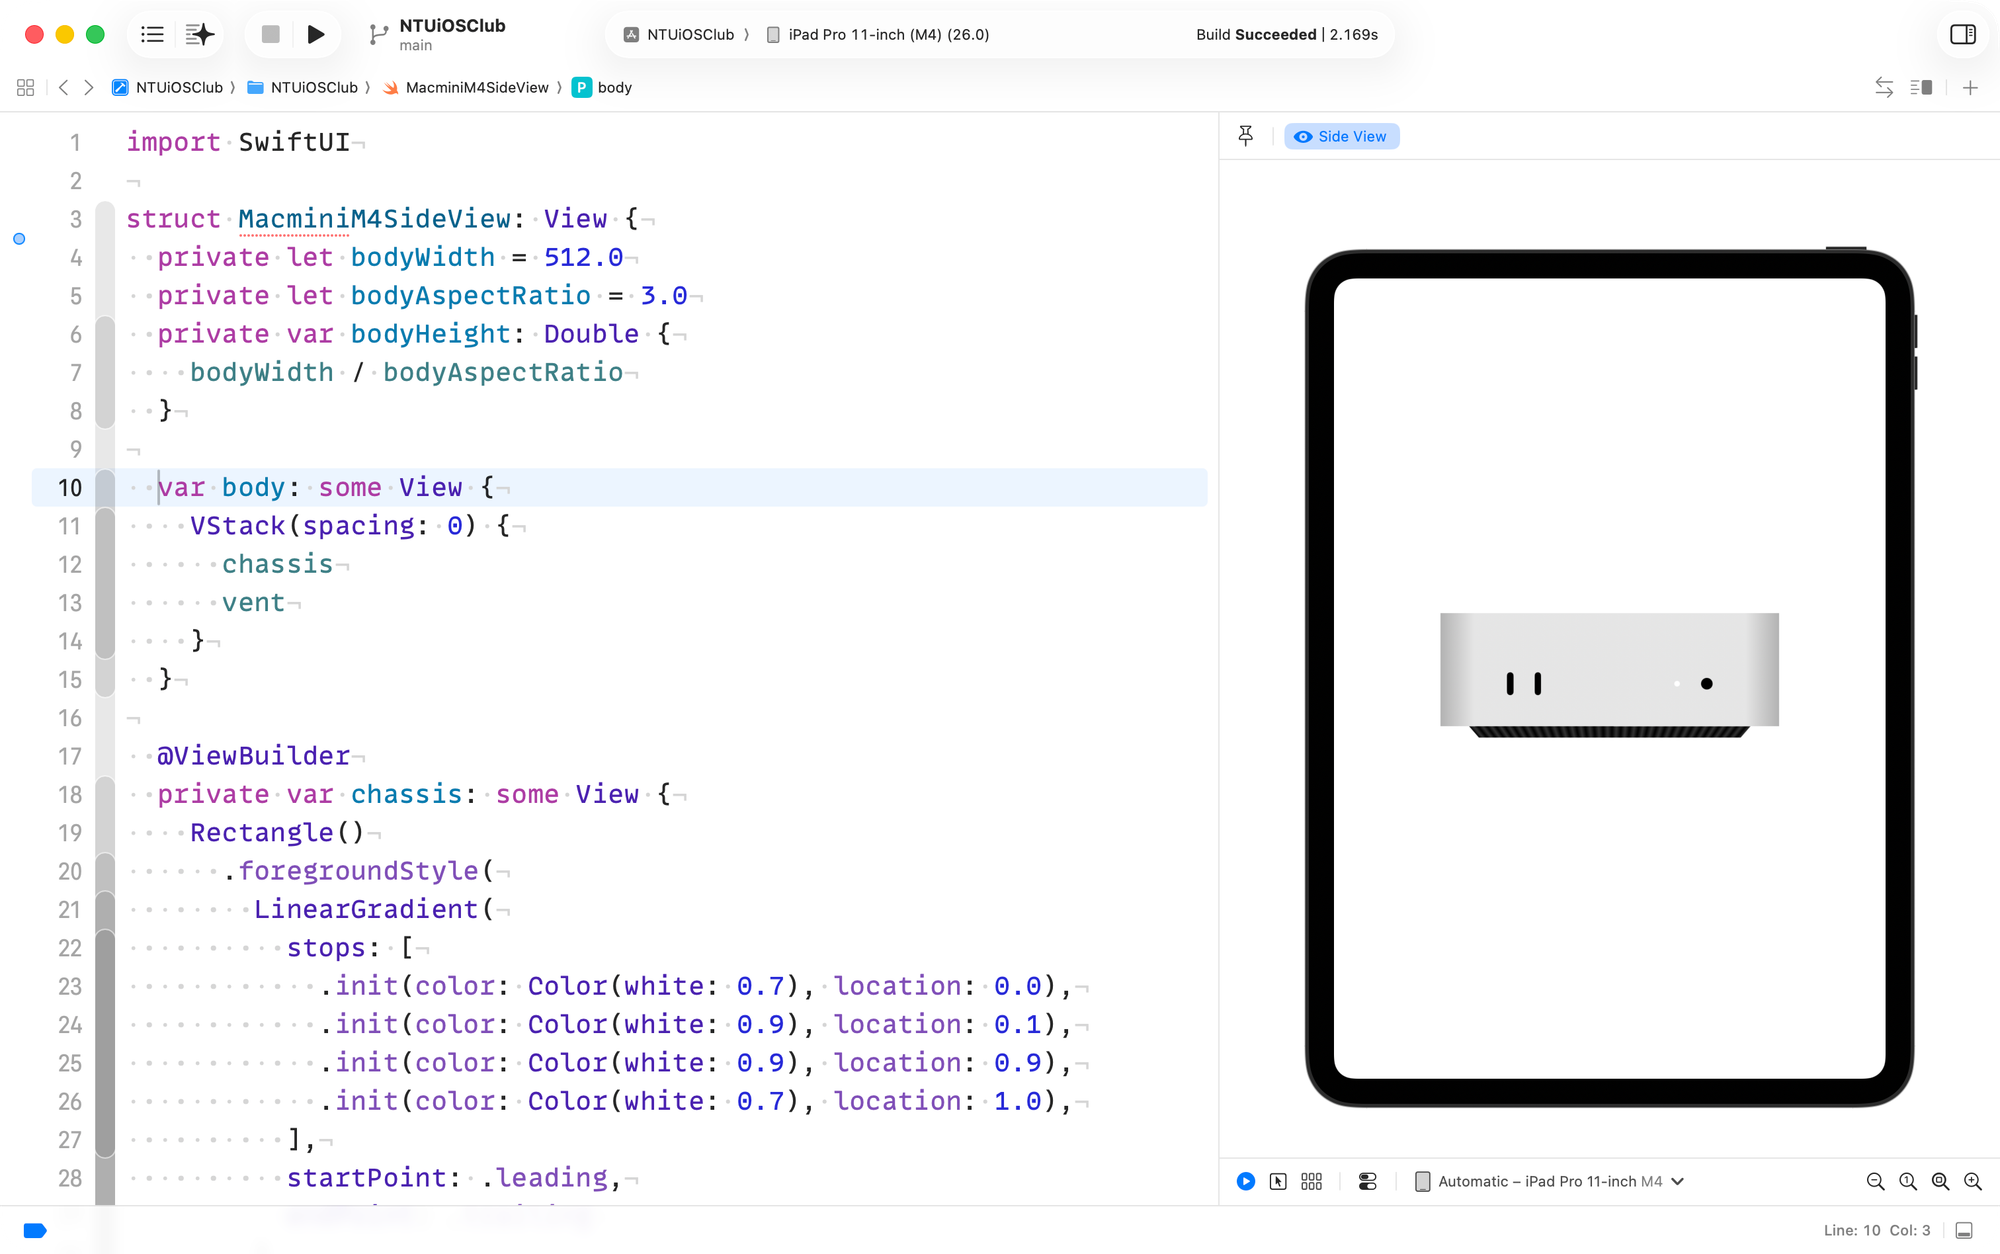
這是我的實作與 Preview 截圖:

程式碼如下:
import SwiftUI

struct MacminiM4SideView: View {
  private let bodyWidth = 512.0
  private let bodyAspectRatio = 3.0
  private var bodyHeight: Double {
    bodyWidth / bodyAspectRatio
  }

  var body: some View {
    VStack(spacing: 0) {
      chassis
      vent
    }
  }

  @ViewBuilder
  private var chassis: some View {
    Rectangle()
      .foregroundStyle(
        LinearGradient(
          stops: [
            .init(color: Color(white: 0.7), location: 0.0),
            .init(color: Color(white: 0.9), location: 0.1),
            .init(color: Color(white: 0.9), location: 0.9),
            .init(color: Color(white: 0.7), location: 1.0),
          ],
          startPoint: .leading,
          endPoint: .trailing
        )
      )
      .aspectRatio(bodyAspectRatio, contentMode: .fit)
      .frame(width: bodyWidth)
      .overlay {
        HStack {
          Spacer()

          HStack(spacing: bodyWidth / 16) {
            usbCPort
            usbCPort
          }

          Spacer()
          Spacer()

          HStack(spacing: bodyWidth / 16) {
            powerIndicator
            audioPort
          }

          Spacer()
        }
        .offset(y: bodyHeight / 8)
      }
  }

  @ViewBuilder
  private var usbCPort: some View {
    Capsule()
      .aspectRatio(1 / 3.5, contentMode: .fit)
      .frame(height: bodyHeight / 5)
  }

  @ViewBuilder
  private var powerIndicator: some View {
    Circle()
      .foregroundStyle(Color(white: 1))
      .frame(height: bodyHeight / 20)
  }

  @ViewBuilder
  private var audioPort: some View {
    Circle()
      .foregroundStyle(Color.black)
      .frame(height: bodyHeight / 10)
  }

  @ViewBuilder
  private var vent: some View {
    Rectangle()
      .frame(width: bodyWidth * 0.8, height: bodyHeight * 0.2)
      .rotation3DEffect(.degrees(-60), axis: (x: 1, y: 0, z: 0))
      .offset(y: bodyHeight / -22)
      .foregroundStyle(
        LinearGradient(
          colors:
            Array(
              repeating: [Color.black, Color.black.opacity(0.8)],
              count: 32
            )
            .flatMap { $0 },
          startPoint: .leading,
          endPoint: .trailing
        )
      )
  }
}

#Preview("Side View") {
  MacminiM4SideView()
}
我們一樣會用到前一篇提到的 bodyWidth 技巧,並且把 bodyAspectRatio 跟計算的 bodyHeight 也都寫出來了。方便有些元件要直接拿這些變數來用。
