✨Swift Dependencies 的語法靈感來自 SwiftUI Environment
Swift Dependencies 的語法設計受到 SwiftUI Environment 啟發,兩者的宣告方式幾乎完全相同。透過互相對照,讓你一次學會兩種機制。

這篇文章是推坑 Swift Dependencies 系列的第四篇。前面三篇談到了這個套件解決的問題,並以 Date 與 UUID 為範例。
接下來,我要先介紹 dependency client 的語法是怎麼來的。
以 Swift Dependencies 內建的 Date 工具為例,用法是:@Dependency(\.date.now) var now。
如果你熟悉 SwiftUI,可能會覺得有點微妙。那是因為,Swift Dependencies 的語法靈感正是來自 SwiftUI。更精確的說,是 Environment 機制。
簡介 SwiftUI Environment
在 SwiftUI 當中,Environment 是「從上層往下層傳遞」的資訊,相對於 Preferences 是由下往上傳遞。
你可以在任何 SwiftUI View 加上 .environment(\.key, value),指定 value 來覆蓋這個 View 以下所有讀取 @Environment(\.key) var value 的地方。
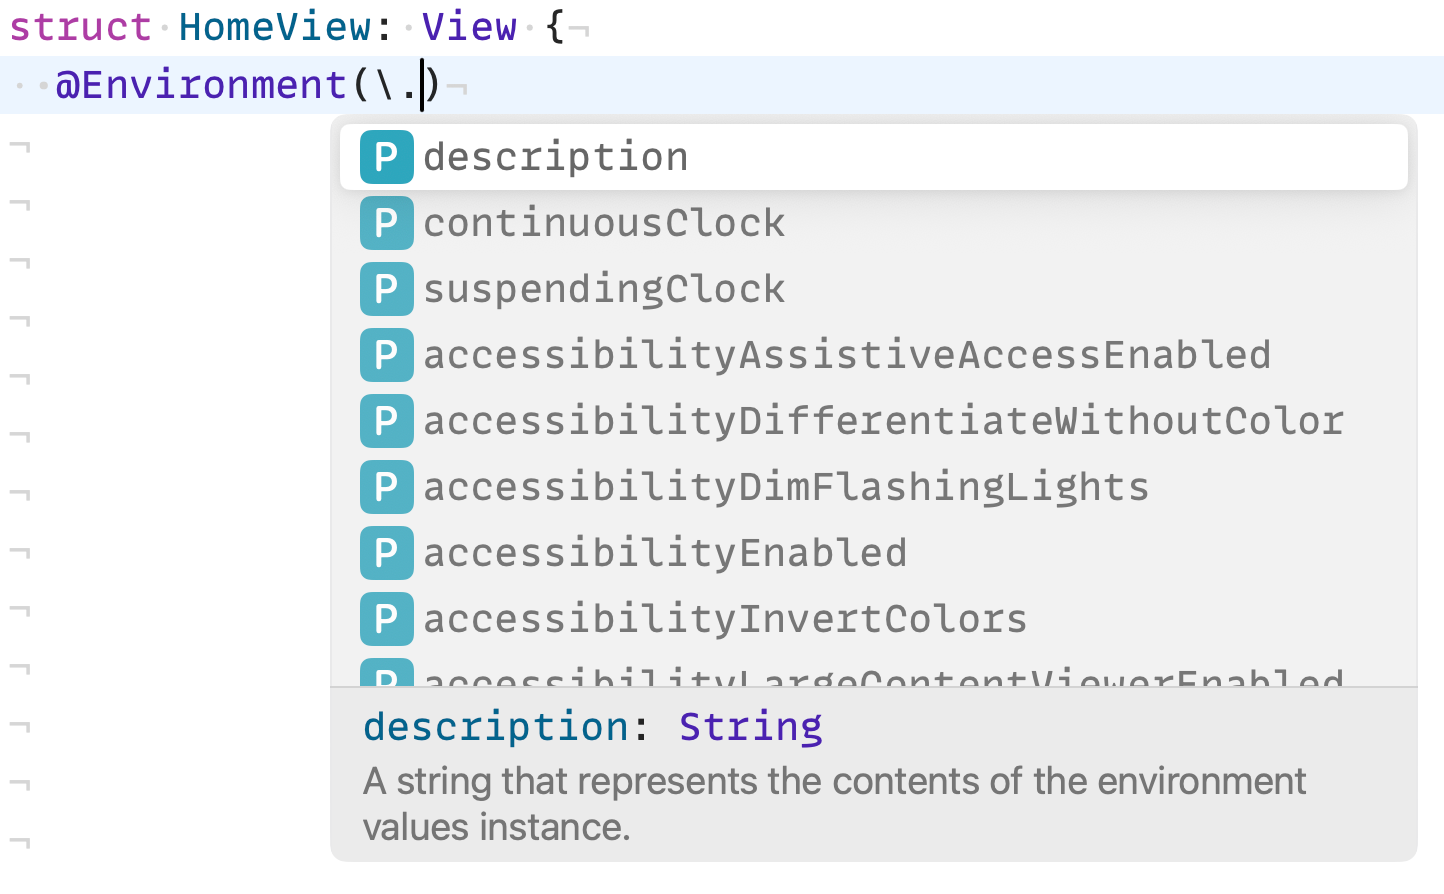
SwiftUI 預設提供了許多 Environment Key。你只要輸入 @Environment(\. 就可以從自動完成列表看到各種 keys。
除了這些內建的 Environment Key,SwiftUI 也提供了自訂的方式。
最初的語法是使用 EnvironmentKey,並且用 computed var 的方式延伸 EnvironmentValues。後續 Apple 提供了簡化的語法,我放在文章最後作為補充。
完整實作一個自訂 Environment 的方式如下,摘自官方文件:
// 1. Create a custom EnvironmentKey
private struct MyEnvironmentKey: EnvironmentKey {
    static let defaultValue: String = "Default value"
}

// 2. Extend EnvironmentValues with computed var
extension EnvironmentValues {
    var myCustomValue: String {
        get { self[MyEnvironmentKey.self] }
        set { self[MyEnvironmentKey.self] = newValue }
    }
}

// 3. Override a value on a SwiftUI view
MyView()
    .environment(\.myCustomValue, "Another string")


// 4. Read the value in a SwiftUI view
@Environment(\.myCustomValue) var customValue: String
在 Swift Dependencies 宣告自訂的 dependency client
看完了 SwiftUI Environment 的宣告與使用語法,接下來我們回頭看 Swift Dependencies。
這篇文章暫時不解釋 Swift Dependencies 的語法與實作細節,之後會討論。目前請先把焦點放在語法的觀察上。
在宣告自訂的 dependency client 時,通常會有以下結構:
- 以
Sendablestruct 為基礎型別 - 每一個方法都是以
@Sendableclosure 的方式提供 - 建議加上
@DependencyClientMacros 來自動產生部分 closure 的預設值,簡化語法。需要import DependenciesMacros
import Dependencies
import DependenciesMacros

// 1. Create a dependency client
@DependencyClient
public struct APIClient: Sendable {
  public var fetchNumber: @Sendable () async throws -> Int
}
之所以加上 public,是因為通常 dependency client 的宣告與使用,會在不同的模組。至於為何使用 struct 與 closures,以及 @DependencyClient Macros 做了哪些事情,會在之後的文章進行討論。
接著,我們要讓這個型別遵循 TestDependencyKey,並且實作 testValue:
// 2. Conform to TestDependencyKey protocol
extension APIClient: TestDependencyKey {
  public static let testValue = Self()
}
最後,延伸 DependencyValues,讓它可以被 @Dependency 找到。
// 3. Extend DependencyValues with computed var
extension DependencyValues {
  public var apiClient: APIClient {
    get { self[APIClient.self] }
    set { self[APIClient.self] = newValue }
  }
}

// 4. Usage
@Dependency(\.apiClient) var apiClient
let number = try await apiClient.fetchNumber()
比較 Swift Dependencies 與 SwiftUI Environment 語法
假如我們把 SwiftUI EnvironmentKey 拆成兩個步驟來寫,就可以看到 Swift Dependencies 跟它幾乎一模一樣 :